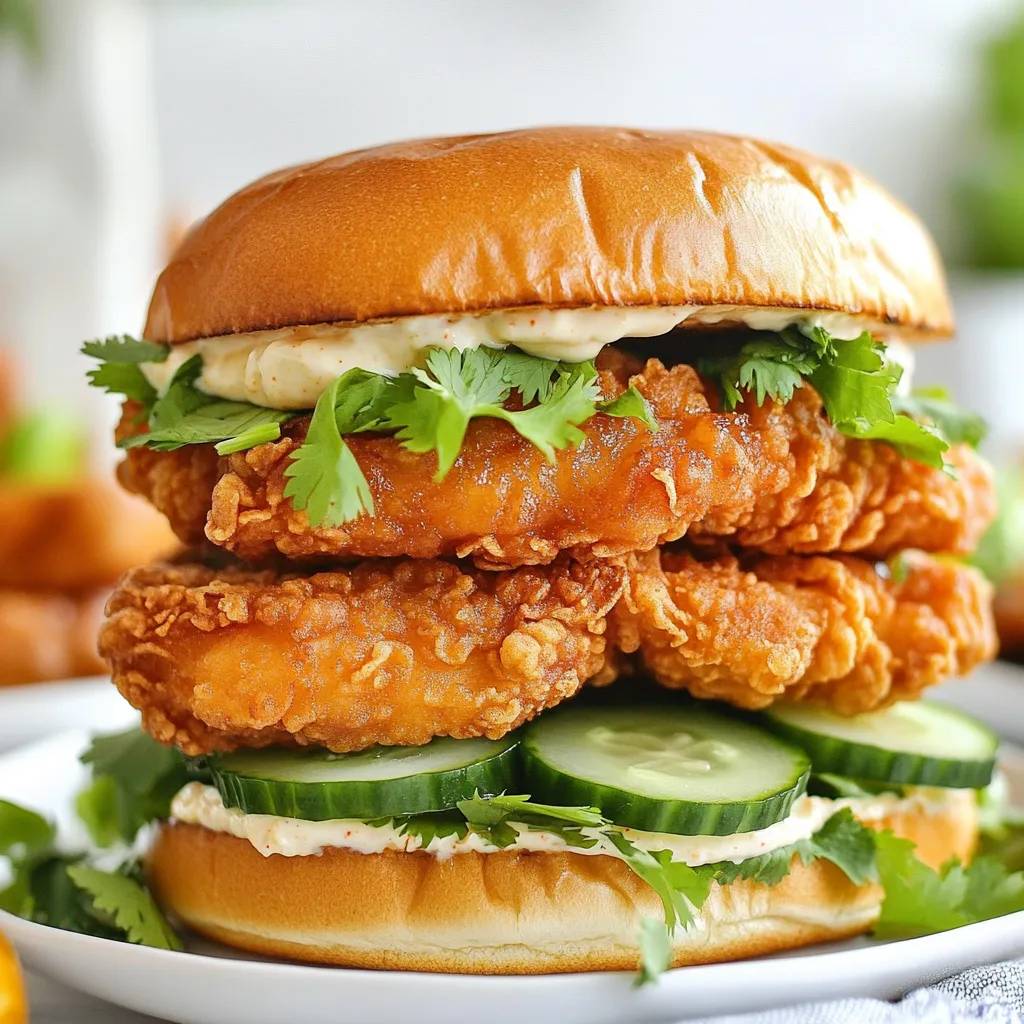
Are you ready to take your taste buds on an adventure? The Thai Fried Chicken Sandwich packs a crunchy, spicy punch that will make your mouth water. In this post, I’ll share my favorite tips, tricks, and substitutions for creating a perfect sandwich. Whether you love bold flavors or need a veggie option, I’ve got you covered. Let’s dive into the delicious world of Thai fried chicken!
Why I Love This Recipe
- Flavor Fusion: This sandwich combines the rich, savory flavors of Thai cuisine with the comforting classic of a fried chicken sandwich, creating an unforgettable taste experience.
- Textural Delight: With its crispy exterior and juicy interior, every bite provides a satisfying crunch followed by tender chicken, making it a textural masterpiece.
- Customizable Heat: The addition of Sriracha allows you to adjust the spiciness to your liking, making this recipe adaptable for every palate.
- Quick Assembly: After frying the chicken, assembling the sandwich is a breeze, allowing you to enjoy a delicious meal in no time!
Ingredients
Main Ingredients Required for Thai Fried Chicken Sandwich
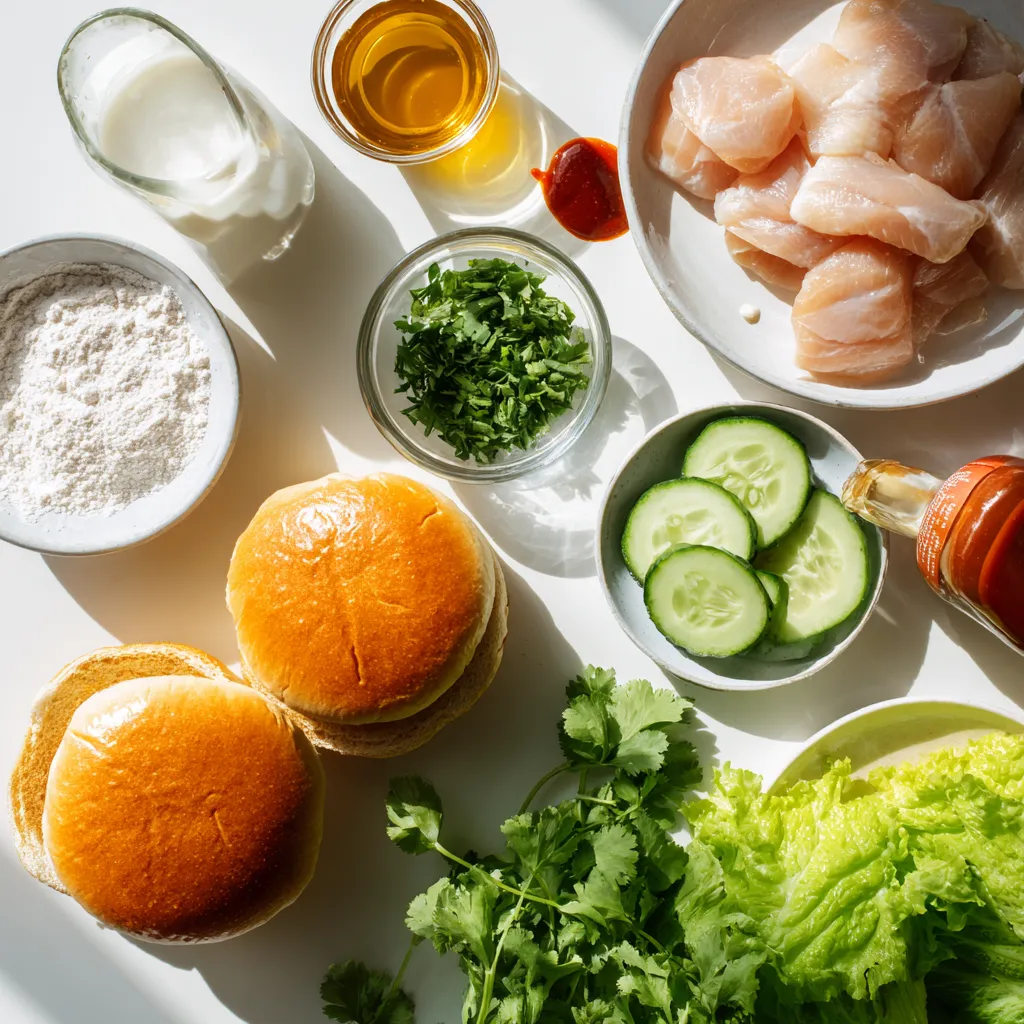
To make a delicious Thai fried chicken sandwich, you need:
– 2 boneless, skinless chicken thighs
– 1 cup buttermilk (or plant-based milk)
– 1 tablespoon fish sauce
– 1 tablespoon Sriracha sauce
– 1 cup all-purpose flour
– 1 teaspoon cornstarch
– 1 teaspoon garlic powder
– 1 teaspoon onion powder
– 1 teaspoon salt
– 1/2 teaspoon freshly ground black pepper
– Oil for frying (about 2 cups)
– 4 brioche or whole wheat hamburger buns
– Fresh lettuce leaves
– Sliced cucumbers
– Fresh cilantro leaves
– Spicy mayo (mix mayonnaise and Sriracha)
Suggested Substitutions for Dietary Preferences
If you want to change a few ingredients, here are some swaps:
– Use almond milk or soy milk for a dairy-free option.
– Replace fish sauce with soy sauce for a vegetarian version.
– Use gluten-free flour for a gluten-free sandwich.
– Swap Sriracha for a milder sauce if you prefer less heat.
Essential Equipment Needed
To prepare this sandwich, you will need:
– A medium mixing bowl for marinating
– Another bowl for the dry coating
– A deep skillet or frying pan for frying
– A thermometer to check oil temperature
– A paper towel-lined plate for draining excess oil
– A spatula for flipping the chicken
These ingredients and tools set you up for a tasty meal. Enjoy every crispy bite!
Step-by-Step Instructions
How to Marinate the Chicken for Optimal Flavor
To start, grab a medium bowl. Whisk together 1 cup of buttermilk, 1 tablespoon of fish sauce, and 1 tablespoon of Sriracha. This mix brings flavor and moisture. Next, add the chicken thighs to the bowl. Make sure they are fully covered in the marinade. Cover the bowl with plastic wrap and place it in the fridge. I recommend marinating for at least 1 hour, but overnight works best. This waiting time allows the flavors to soak in deeply.
Preparing the Coating to Achieve Crispy Texture
In another bowl, mix 1 cup of all-purpose flour with 1 teaspoon of cornstarch, 1 teaspoon of garlic powder, 1 teaspoon of onion powder, 1 teaspoon of salt, and 1/2 teaspoon of black pepper. Stir it well to combine all the dry ingredients. This mixture will create a crispy crust. You want it to be even and flavorful for the chicken. Set this bowl aside while you prepare to fry.
Frying Techniques for Perfectly Cooked Chicken
Now it’s time to heat the oil. Pour about 2 cups of oil into a deep skillet. You need about 1 inch of oil for frying. Heat it over medium-high heat until it reaches 350°F (175°C). You can check the oil’s heat by dropping in a pinch of the flour mix. If it sizzles, you’re ready. Remove the chicken from the marinade, letting excess drip off. Dredge each thigh in the flour mix, pressing gently for a good coating. Carefully place the chicken in the hot oil. Fry for about 5 to 7 minutes per side. Look for a golden brown color and ensure the chicken reaches an internal temperature of at least 165°F (74°C). When cooked, transfer the chicken to a paper towel-lined plate to drain any extra oil. Enjoy the crunchy sound as you place it down!
Tips & Tricks
Best Practices for Marinating Chicken
Marinating chicken makes it juicy and full of flavor. For this sandwich, I use buttermilk, fish sauce, and Sriracha. Mix these well in a bowl. Add your chicken thighs, making sure they are fully covered. Cover with plastic wrap and let it sit in the fridge for at least one hour. If you can, marinate overnight. This step really deepens the flavor and makes the chicken more tender.
How to Maintain Optimal Oil Temperature
Keeping the right oil temperature is key for crispy chicken. Heat your oil to about 350°F (175°C). You can test it by dropping a pinch of the coating mix in the oil. If it sizzles and bubbles, the oil is ready. If the oil is too hot, the chicken will burn. If it’s too cold, the chicken will soak up too much oil and become greasy. Use a thermometer for best results.
Ways to Enhance the Flavor of Spicy Mayo
Spicy mayo is easy to make and adds a kick. Start with mayonnaise as your base. Mix in Sriracha to your liking. For extra flavor, try adding lime juice or a touch of garlic powder. This can balance the heat and add depth. You can even mix in some fresh herbs like cilantro for a fresh taste. Adjust the spices to make it your own!
Pro Tips
- Marination Matters: For the best flavor, marinate the chicken thighs overnight. This allows the buttermilk and spices to penetrate deeply, resulting in tender and flavorful meat.
- Temperature Check: Use a thermometer to check the oil temperature. Frying at the right temperature (around 350°F) ensures a crispy exterior without overcooking the chicken inside.
- Press for Perfection: When dredging the chicken in flour, press gently but firmly to ensure a thick and even coating. This helps achieve that perfect crispy crust.
- Serving Suggestion: Serve the sandwiches immediately after assembling for the best texture and flavor. If you’re prepping ahead, keep components separate until ready to serve.
Variations
Alternative Flavors for Marinating the Chicken
You can play with flavors in your marinade. Instead of fish sauce, use soy sauce for a vegan touch. Add lime juice or ginger for a fresh twist. Try adding different chili sauces to adjust the heat. A touch of honey or brown sugar gives a sweet kick. Experimenting with these flavors makes your chicken unique.
Different Types of Buns to Use
While brioche is soft and rich, you can use whole wheat for a hearty option. Pretzel buns add a fun twist with their salty crust. For a lighter choice, consider lettuce wraps. They keep it fresh and low-carb. Each bun type changes the sandwich experience, so try different ones!
Veggie Options for a Meatless Sandwich
If you want a meatless version, use fried tofu or tempeh. Marinate the tofu like chicken for great taste. Grilled eggplant or portobello mushrooms also work well. They add depth and flavor to the sandwich. Top with the same spicy mayo and fresh veggies for a delicious bite.
Storage Info
How to Store Leftover Fried Chicken
To store leftover fried chicken, let it cool first. Place it in an airtight container. This keeps it fresh. You can store it in the fridge for up to three days. If you leave it out, it will spoil quickly.
Reheating Tips for Best Taste and Texture
When you are ready to eat, reheat the chicken in the oven. Set it to 375°F (190°C). This helps keep the chicken crispy. Heat it for about 10-15 minutes. You can also use an air fryer for a quick option. It will keep the chicken crunchy.
Freezing Options for Frozen Sandwich Components
You can freeze the fried chicken for later. Wrap the pieces in plastic wrap, then place them in a freezer bag. This method stops freezer burn. You can keep it for up to three months. For buns, wrap them in foil before freezing. When you are ready, thaw them in the fridge overnight.
FAQs
What Can I Serve with Thai Fried Chicken Sandwiches?
You can serve many tasty sides with Thai fried chicken sandwiches. Here are some great options:
– Crispy French fries: These add a nice crunch.
– Sweet potato fries: They provide a sweet contrast.
– Coleslaw: It adds a fresh, crunchy bite.
– Pickles: They bring tangy flavors that pair well.
– Asian-style salad: A light, refreshing side works great too.
Each of these sides complements the sandwich’s bold flavors.
How Can I Make a Gluten-Free Version?
To make a gluten-free Thai fried chicken sandwich, swap regular flour for gluten-free flour. You can use:
– Rice flour: This keeps it light and crispy.
– Almond flour: This adds a nutty flavor.
– Chickpea flour: This gives a unique taste and texture.
Choose gluten-free buns to complete the sandwich. Always check labels for allergens.
What is the Best Way to Ensure the Chicken is Fully Cooked?
To ensure your chicken is fully cooked, use a meat thermometer. Insert it into the thickest part of the thigh. The chicken should reach an internal temperature of 165°F (74°C). Here are some tips:
– Visual check: The chicken should be golden brown.
– Juices: They should run clear, not pink.
– Cut test: If unsure, cut into the thickest part. No pink means it’s done!
Following these steps ensures a safe, delicious meal.
You now know how to make a Thai fried chicken sandwich. We looked at important ingredients, cooking steps, and great tips for the best flavor. You can even try fun variations or store leftovers well. Remember to adjust for your tastes or dietary needs. Keep experimenting and enjoy this tasty dish! Your kitchen will smell amazing, and your meals will shine. Start cooking and share your delicious result