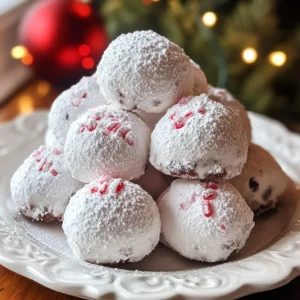
Chocolate Peppermint Snowball Cookies
Deliciously soft cookies with a delightful chocolate and peppermint flavor, perfect for the holiday season.
Ingredients
- 1 cup unsalted butter, softened to room temperature
- 0.5 cup powdered sugar, plus extra for a final dusting
- 1 teaspoon vanilla extract
- 0.5 teaspoon peppermint extract
- 2 cups all-purpose flour
- 0.5 cup unsweetened cocoa powder
- 0.25 teaspoon salt
- 0.25 cup semi-sweet chocolate chips
- 0.25 cup crushed peppermint candies
Instructions
- Begin by preheating your oven to 350°F (175°C). While it heats, prepare a baking sheet by lining it with parchment paper to prevent sticking.
- In a large mixing bowl, combine the softened butter and 1/2 cup of powdered sugar. Using an electric mixer, cream these together on medium speed until the mixture becomes light and fluffy—this should take about 3-4 minutes.
- Add the vanilla extract and peppermint extract to the creamed butter and sugar mixture. Blend until everything is well incorporated, ensuring the extracts are evenly mixed in.
- In a separate bowl, sift together the all-purpose flour, cocoa powder, and salt. Gradually add this dry mixture to the wet ingredients, mixing on low speed only until the dough comes together—be careful not to overmix.
- Gently fold in the semi-sweet chocolate chips and crushed peppermint candies with a spatula, ensuring they are evenly dispersed throughout the dough for delightful bites.
- Using a tablespoon, scoop out portions of the dough and roll them between your palms to form small balls, approximately 1 inch in diameter. Place these on the prepared baking sheet, spacing them about 2 inches apart to allow for spreading.
- Bake the cookies in the preheated oven for 10-12 minutes. They should look slightly soft in the center when you take them out, as they will continue to set as they cool.
- Allow the cookies to cool on the baking sheet for about 5 minutes. This helps them firm up slightly before transferring them to a wire rack to cool completely.
- Once the cookies have cooled, take the extra powdered sugar and dust them generously for a beautiful snowy appearance, adding to their festive charm.
Notes
For an extra touch, arrange the cookies on a decorative plate, and sprinkle a few whole peppermint candies around the edges for an attractive holiday display.